
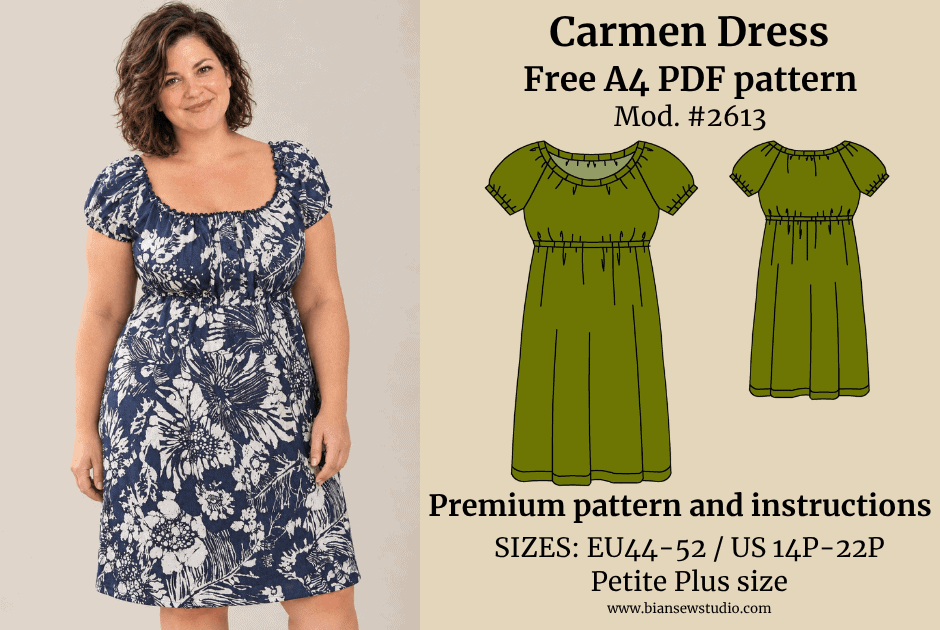
Carmen Dress: A Petite Plus Size Sewing Pattern
Finding a dress sewing pattern that is designed specifically for a petite plus-size figure can
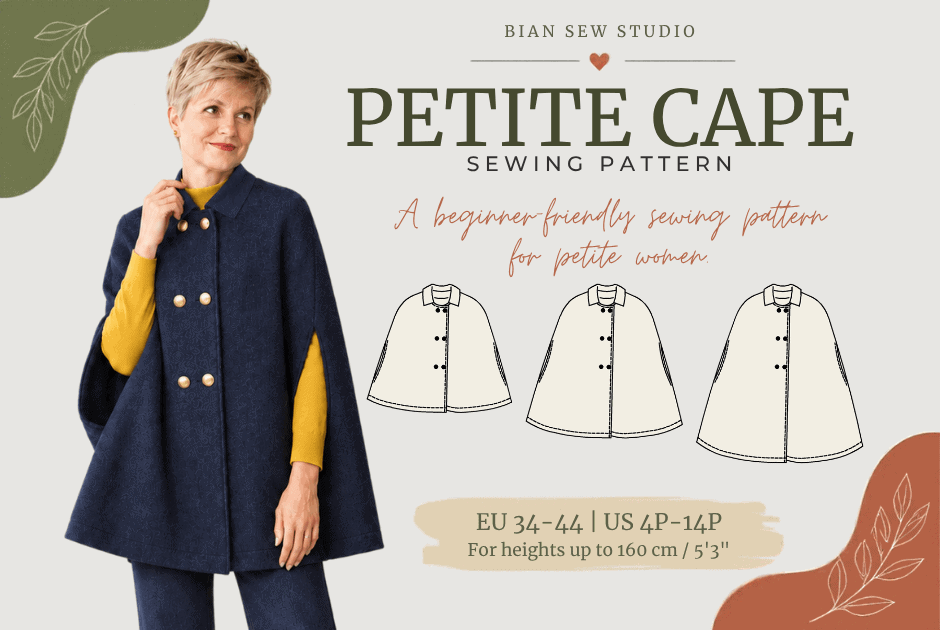
Autumn has arrived, the mornings are getting cooler, but it is not quite time for a heavy winter coat yet. That in-between season inspired my latest sewing pattern: the Petite Cape.
This simple and feminine petite cape sewing pattern is designed to be an easy addition to your fall and spring wardrobe. With its small collar and decorative buttons, the cape has a feminine and youthful look, while the relaxed shape makes it comfortable and easy to move in.
It is a lovely alternative to a blazer or lightweight jacket when you want something a little warmer without feeling restricted. You can simply throw it over your everyday outfit and enjoy the comfort of a soft, cozy layer.
The Petite Cape is specifically designed for petite women 160 cm / 5’3″ and under. It is available in EU sizes 34–44, approximately equivalent to US petite sizes 4P–14P.
You can choose from three different finished lengths:
Version A: 68–70 cm (26¾–27½”)
Version B: 82–84 cm (32¼–33″)
Version C: 96–98 cm (37¾–38½”)
This gives you the freedom to choose a shorter, more jacket-like version or a longer, more dramatic cape.
The pattern is suitable for soft coat and jacket-weight fabrics, and it looks equally lovely in a solid color or a beautiful print.
If you are new to sewing garments, this is a great project to try.
The Petite Cape is rated Beginner (Learning level) and has a relatively simple construction. The instructions guide you through the process step by step, from cutting the fabric and interfacing to sewing the cape, attaching the collar and facing, finishing the hem, and adding the snaps and decorative buttons.
The front closes with three sew-on snaps, while six decorative buttons add the finishing touch. The buttons are decorative only, so you do not need to sew buttonholes.
That makes this beginner sewing pattern a nice way to make something that looks polished without taking on a complicated coat project.
As with my other patterns, I wanted to make the Petite Cape available in both a free and a premium version.
The free sewing pattern includes a layered A4 PDF pattern and will be shared through my October 2026 newsletter.
If you would like the complete pattern package, the premium Petite Cape sewing pattern is available in both my own webshop and my Etsy shop.
The premium pattern includes:
Layered A4 PDF pattern
Layered A0 PDF pattern
Layered Projector file
Fabric requirements
Cutting list
Fabric layout diagrams
Step-by-step illustrated sewing instructions
Sewing glossary
The pattern itself does not include seam allowances. The sewing instructions specify a 1.5 cm (⅝”) seam allowance and a 3 cm (1¼”) hem allowance.
I designed this petite cape to be a practical piece that you can wear throughout the cooler seasons. It is light enough for those days when a winter coat feels like too much, but warm and cozy enough to make chilly mornings more comfortable.
And because it is a beginner-friendly sewing pattern, you do not need years of sewing experience to make it.
Choose your favorite fabric, pick your length, and make a cape that fits your petite proportions.
If you make your own Petite Cape, I would love to see it! Share a photo of your finished garment and use #biansewstudio so I can find your creation.
Happy sewing!
Bian Sew Studio
For this petite cape, you’ll need a few basic sewing supplies.
I’ve linked some of my Amazon recommendations below.
I recommend a lightweight woven fusible interfacing such as Pellon Shape-Flex SF101.
3 sew-on snaps for the front closure
A good pair of fabric scissors makes cutting your cape much easier.
Handy for holding layers together while sewing.
An essential little tool, especially when you’re learning.
As an Amazon Associate I earn from qualifying purchases.
Here are some essential tips for a successful sewing project:
By following these guidelines, you’ll achieve a professional-looking finish and a well-fitting garment or accessory. Happy sewing! 🧵✂️
Finding a dress sewing pattern that is designed specifically for a petite plus-size figure can
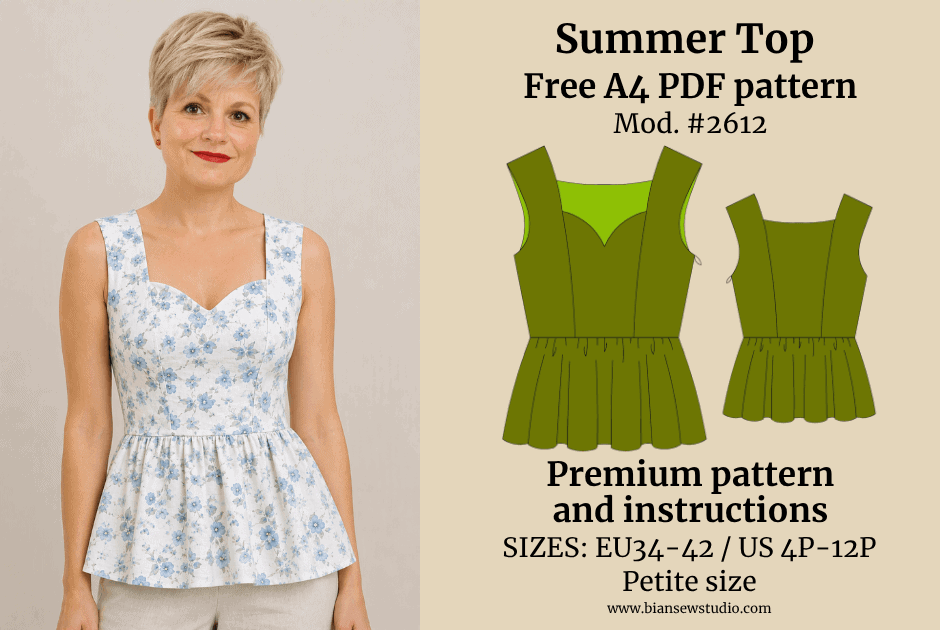
Today I’m sharing a new summer top sewing pattern with you. I designed this style

Some dresses are special because of their shape. Others stand out because of their fabric.
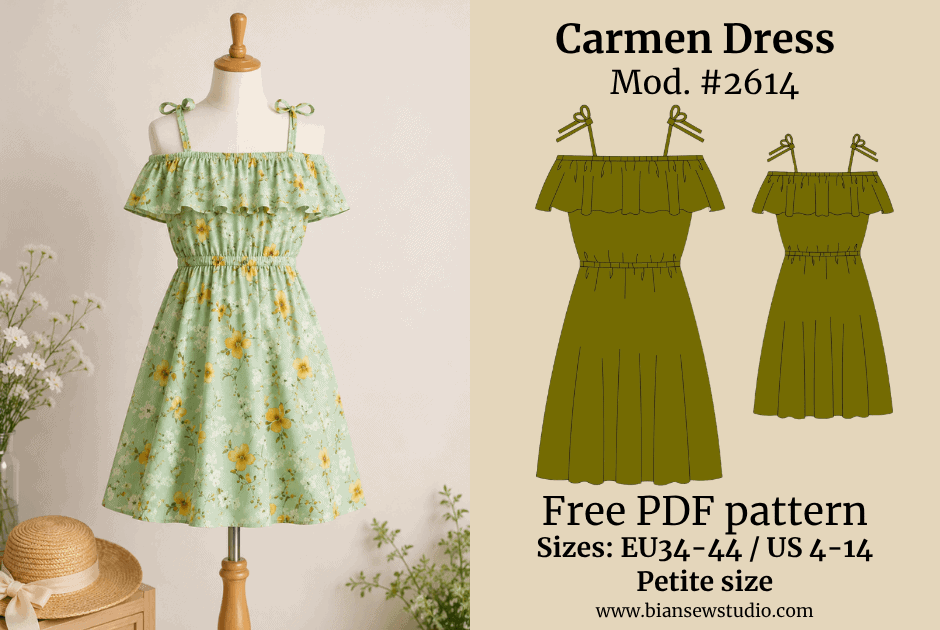
Stay Cool in Style with a Dress Designed Especially for Petite Women One of the
We noticed you're visiting from Hungary. We've updated our prices to Hungarian forint for your shopping convenience. Use Euro instead. Dismiss